
Lightroom presets are specific adjustments that can be repeatedly applied to our still photos at the click of a button. However, what if you wanted to apply these presets to a video? Or maybe you’d like to edit your photos with the same look in another program.
For this, we’ll need to create a Look-Up Table, otherwise known as a LUT.
What Is a LUT?
In short, a Look-Up Table (LUT) is a file containing math instructions to replace one set of colours with another set of colours. The process of creating a LUT is done pixel by pixel, and therefore is incredibly precise.
How to Turn a Lightroom Preset Into a LUT
In this LUT tutorial, you’ll learn to turn your favourite presets from Lightroom into LUTs. You’ll be able to apply the same look and feel from your still photos to your videos. Before you know it, you’ll become an expert LUT generator!
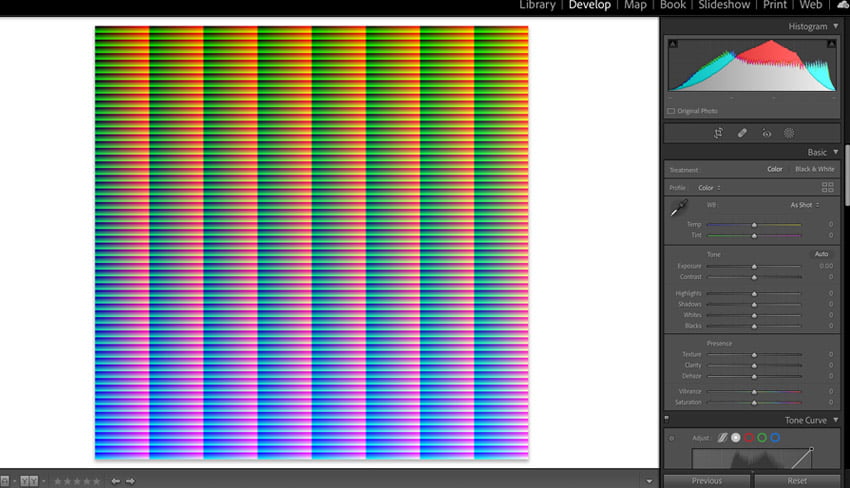
1. Download a HALD and Import to Lightroom
This is the first step in how to make a LUT from your Lightroom presets. A HALD is a pattern containing all colour values (pixels) for a specific size of grid. By applying our Lightroom Preset to a HALD, we’ll be able to generate a three-dimensional representation of our two-dimensional image adjustments.
Download a HALD from the free lutCreator.js. Import the JPG or PNG file into Lightroom.
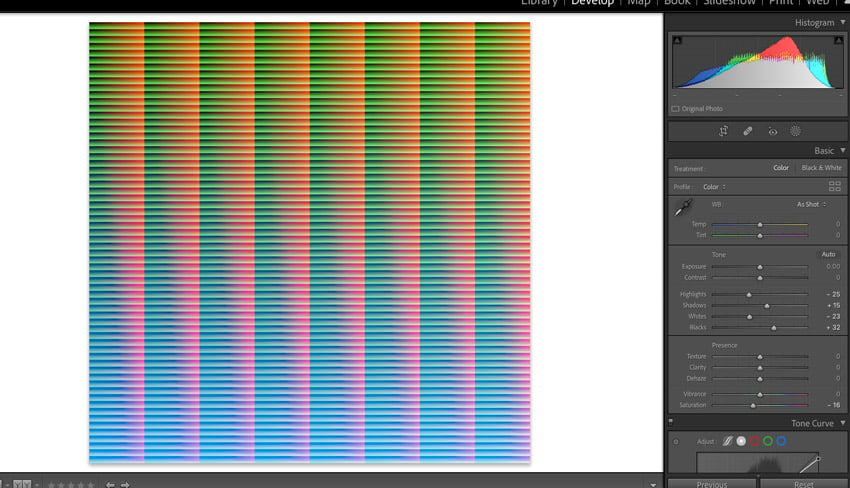
2. Apply Your Lightroom Preset
Apply your favourite preset to the HALD. All of the HALD’s pixels will shift accordingly. It is important to note here that a LUT can only affect things such as colours, contrast, and brightness. Dynamic effects, such as grain, sharpening, or vignetting cannot be transferred. If you include these types of effects, it can result in a corrupted LUT.


3. Export the HALD & Convert to CUBE
Now that the preset has been applied, let’s export your edited HALD. You’ll need to export as either a PNG (without compression) or a JPG (at 100% quality).
Convert to CUBE
The final step is to convert your edited HALD into a CUBE. I promise this is the last file extension you’ll need to know for this tutorial!
A CUBE is a file that can describe lookup tables (LUTs) in three-dimensional space. This CUBE file will serve as the preset file to apply to your videos. Convert your HALD to CUBE using lutcreator.js. Simply click the Convert to .CUBE button, upload your PNG or JPG, and your CUBE file will be created.
4. Apply Your LUT
This is the final step in learning how to make a LUT from your Lightroom presets. Open your favourite video editing software and apply the CUBE to your video clips. When applied, your videos will now have the same adjustments that your Lightroom preset contained!
You’ve Done It! You’ve Turned Your Favourite Presets From Lightroom Into LUTs
That’s it! Wonder no more how to turn a Lightroom preset into a LUT. You can make the adjustments you’ve refined in your presets from Lightroom into LUTs to apply to your videos. With this easy LUT tutorial, you’ve basically become a LUT generator!
More Lightroom Learning With Envato Tuts+
Gain momentum and keep it going with these Adobe Lightroom tutorials!
You can find a FREE COURSE on basic editing in Adobe Lightroom on the Envato Tuts+ YouTube channel:
Or you can continue exploring the website to find helpful Adobe Lightroom Classic tutorials like these ones: