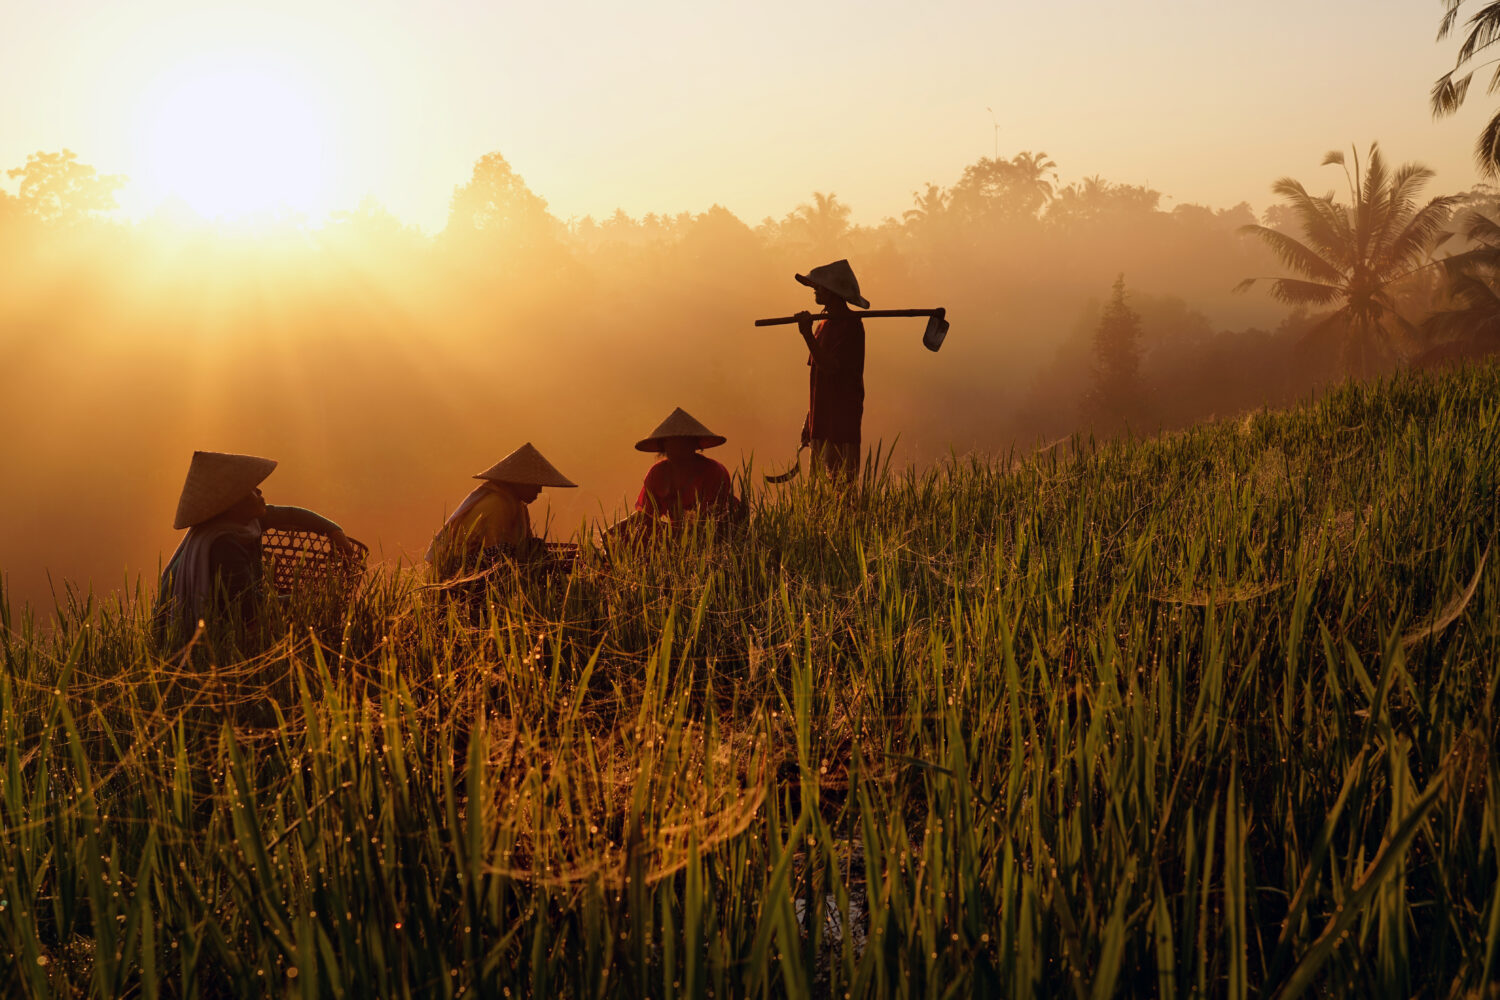
Golden hour, the period shortly after sunrise and before sunset, offers photographers some of the most captivating light of the day. This golden window of time is renowned for its warm hues, soft shadows, and overall magical quality that can transform ordinary scenes into extraordinary compositions. Here’s a comprehensive guide to mastering golden hour photography.
Understanding Golden Hour
Golden hour occurs when the sun is low on the horizon, casting a warm, diffused light. This light is softer and more flattering than the harsh midday sun, reducing the likelihood of overexposed highlights and deep shadows. The golden hour typically lasts about an hour after sunrise and an hour before sunset, however, the exact duration can vary depending on your geographical location and the time of year.
Preparing for Golden Hour
Research and Plan: Use apps like The Photographer’s Ephemeris or Sun Surveyor to determine the exact timing and position of the sun during golden hour in your location. Planning ahead allows you to choose the best spots and angles for your shots.
Scout Locations: Visit potential locations beforehand to identify interesting compositions and potential obstacles. Look for places with open views of the horizon, reflective surfaces like water, and natural or man-made elements that can enhance your photos.
Pack Essentials: Ensure you have all the necessary gear, including a tripod for stability, extra batteries, memory cards, and appropriate lenses. A wide-angle lens can capture sweeping landscapes, while a telephoto lens is great for isolating subjects and compressing the scene.
Techniques for Capturing Golden Hour Magic
Embrace the Warmth: Golden hour is known for its warm tones. Adjust your white balance to “daylight” or “shade” to enhance these tones and create a cozy, inviting atmosphere in your photos.
Play with Backlighting: Position your subject between the camera and the sun to create stunning backlit scenes. This technique can produce beautiful rim light around your subject, adding depth and dimension. Be mindful of lens flare, and use a lens hood or your hand to shield the lens if needed.
Experiment with Silhouettes: The stark contrast between a bright sky and a darker foreground can create striking silhouettes. To achieve this effect, position your subject against the brightest part of the sky and adjust your exposure using the background. Silhouettes are most effective with strong, easily recognizable shapes.

Capture Reflections: Bodies of water like lakes, rivers, or even puddles can reflect the golden hues of the sky, doubling the visual impact of the scene. Look for opportunities to incorporate reflections into your compositions for added interest.
Use the Rule of Thirds: As with any composition, the rule of thirds can help balance your images. Place key elements like the horizon, sun, or subjects along the grid lines or intersections to create visually appealing and dynamic shots.
Advanced Techniques
HDR Photography: Golden hour scenes often have a high dynamic range, with bright skies and darker foregrounds. Use HDR (High Dynamic Range) techniques to capture multiple exposures and blend them together, ensuring detail in both highlights and shadows.
Long Exposures: Experiment with long exposures to smooth out water surfaces, capture motion blur in clouds, or add a dreamy effect to your photos. Use a tripod and neutral density (ND) filter to extend exposure times without overexposing the image.
Foreground Interest: Include interesting foreground elements to add depth and lead the viewer’s eye into the scene. Rocks, flowers, and architectural features can all serve as compelling foreground subjects.

Practical Tips for Golden Hour Shooting
Arrive Early and Stay Late: Golden hour is fleeting, so arrive early to set up and capture the changing light. Stay a bit longer after the sun sets to catch the soft, pastel tones of the blue hour.
Bracketing: Use exposure bracketing to ensure you capture the best possible exposure. This technique involves taking multiple shots at different exposure levels to combine later in post-processing.
Manual Mode: Shoot in manual mode to have full control over exposure settings. Adjust the aperture, shutter speed, and ISO to achieve the desired effect and ensure optimal image quality.
Golden hour photography is all about capturing the enchanting light and mood of this special time of day. By understanding the nuances of golden hour lighting and employing these techniques, you can create breathtaking images that resonate with warmth and beauty. Embrace the magic of the golden hour and let it transform your photography.
Not on 500px yet? Sign up here to explore more impactful photography.