")


If you’ve been online at all, you’ve probably seen many of these videos circulating where there are shape-shifting and morphing objects, in very surreal, eerily fluid scenes. Sometimes they are incredibly fluid, but other times they may seem clunky, or confusing. What you’re seeing is a process known as AI Frame Interpolation. Interpolation, in the context of video and animation, refers to the process of generating intermediate frames between two images or frames to produce a smoother transition. This technique is especially useful in enhancing the fluidity of animations or videos, especially when the original footage might be lacking in frame rate or when trying to create a smooth transition between two distinct images.
Jump to content in this section
Introduction
Frame interpolation can be visualized as filling in the gaps between two frames. Imagine you have a sequence where a ball moves from the left side of the screen to the right side, and back in a few frames. Naturally, this would not appear smooth if you just placed the frames next to each other in a timeline. However, this is where the power of video interpolation can be seen. See this video example:
The video above may just appear like a simple video of a white ball moving across a black background, but it’s so much more. What you’re seeing here was generated using 9 different independent frames. RunwayML’s intelligent AI system created frames in between to create a fluid video as you can see with this screenshot of the editing platform.


White ball video frames for AI video frame interpolation tutorial
With interpolation, you can generate additional frames where the ball appears at various positions between the start and end points, making the movement appear smoother.
The applications of AI interpolation are vast. They can be used in video editing to make high frame-rate videos from standard frame-rate footage, in animations to create smoother transitions, or in any scenario where there’s a need to bridge the gap between two frames or images.
Runway has recently released its interpolation toolset, and I’m excited to demonstrate the diverse range of applications it offers. Surprisingly, there are far more uses for this technology than one might initially assume! In this tutorial, I will be conducting a science experiment with you.
The frames I will use are from video footage I obtained from Envato Elements. Envato Elements offers access to millions of unique, high-quality photos, images, audio, videos, and more. If you wish to follow along with this experiment, please refer to the section below.


I will demonstrate the original video footage, showcase the frames I will be using, let Runway attempt to create the intermediate frames, and finally, we can compare the original video with the AI-generated video using interpolation from Runway. If you want to follow along you can follow these steps to try it out for yourself! If you already have your frame’s that you’ll be using you can skip to the interpolation settings portion of the guide.
Before delving deeper, I’d like to address a common concern: the perceived “clunkiness” or choppiness often associated with videos utilizing this technology. It’s important to note that these noticeable instances are just a fraction of the overall use cases for interpolation. In fact, many applications go completely unnoticed due to their seamless execution. Frame interpretation results don’t have to be exaggerated; in fact, they can be a powerful tool for creating videos with subtle, yet impactful, movement. If you have a series of rapidly captured photos, leveraging interpolation can create smoother videos by intelligently “filling in the gaps” between each frame. Therefore, the more frames you have at your disposal, the better the outcome can be.
Optional – Obtaining the Sample Video from Envato Elements
To make the most of RunwayML’s features, it’s advisable to start with a high-quality video. In my case, I’ll begin with a video so I can demonstrate the distinction between a completed video and a version generated using frames from the original footage. This technique will provide a visual representation of how interpolation differs from traditional videography.
If you’re in need of a video, you can visit Envato Elements, a platform offering millions of images, videos, music, and more. If you already have an Envato Elements account, you can utilize these resources for your ongoing projects, provided you appropriately document your usage, as I’ll outline below.
If you already possess your video clip, feel free to proceed to the next section.
Step 1
Go to Envato Elements


Step 2
Click on the ‘All Items‘ dropdown, then choose ‘Stock Footage‘.


User selecting Stock Video for AI frame interpolation tutorial
Step 3
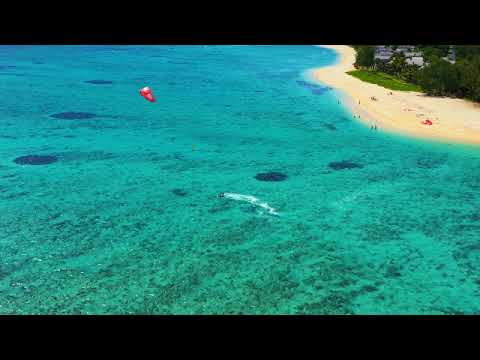
I’m going to just find something with a lot of motion, by searching for ‘Surfer‘. Click on the thumbnail video of your video of choice. For this one, I’m choosing ‘Kitesurfing Le Morne, Mauritius. Drone view…“.


Step 4
The next screen you’ll find is a screen to download the video footage. Click on ‘Download‘.


Step 5
Next, you’ll have to assign the download to a specific project. This allows you to freely use the footage in your project. In this case I’m typing “Tuts+Work“. You can name yours whatever you want.


Step 6
Click on ‘Add & Download’.


User adding a description for downloading video for video interpolation guide.
Step 7
You can save the file wherever you prefer.
Here’s the completed/source video I downloaded, which will serve as our starting point:

TIP: Creating Moments from Photos: If you have multiple photos taken in rapid succession, frame interpolation can turn them into a smooth video sequence.
Step 8
Now, let’s trim a few frames from the video for our experiment. To do this, I just press the ‘prt sc‘ button on my keyboard, and save the screen shot to a file in the correct order. I’ll play the video on my computer and capture screenshots at relevant moments. Here are the initial frames I’ve captured:


Step-by-Step Tutorial: Using Frame Interpolation with Runway
TIP: Understanding the Basics: AI image interpolation can be used to create surreal scenes with shape-shifting or morphing objects. However, its applications are not limited to extreme effects. It can introduce subtle movements in videos, making still images appear dynamic.
Step 1
Get started head over to ‘runwayml.com‘.


Step 2
If this is your first time, you’ll need to click on ‘Sign Up – It’s Free‘ Button.


User clicking the Sign Up Button for AI image interpolation tutorial
Step 3
There are a few ways to do this, but we’ll start with accessing the Runway ai video Frame Interpolation Tool directly. Once you have registered with the Runway site, you will need to select the Frame Interpolation model. To find it click on ‘View All Tools‘ text near the top.


User clicking View all Tools option for AI frame interpolation tutorial
Step 4
Using the Runway AI video tool, Click on the ‘Frame Interpolation‘ button. This will take you to the Interpolation Settings Screen:


Step 5
Next, upload your input images and specify your desired number of output frames. For the sake of this tutorial, I’m going to be using a few frames as I mentioned earlier in the optional instructions section. If you’re not sure what I mean, scroll up to the section titled: ‘Optional: Obtaining the sample video from Envato Elements.‘ You may need to rearrange the frames to get them in sequential order.


Step 6
Finally, adjust your ‘Clip Duration‘ to whatever you would like. Because I want to try to keep things similar to the original video to be able to compare, I’ll keep the total time between frames to about 3 seconds, which should get it to the approximate length of the original video.
Step 7
Click ‘Generate‘.


User clicking ‘Generate’ button for AI image interpolation tutorial
Step 8
After you render it you can try different ‘Clip duration‘ settings to see if you get more desirable results. I ended up settling for “35.5s“, and I must say I’m pretty impressed.
Step 9
When you’re happy with the results, click on ‘Export‘ button to download your file.


User clicking the ‘Export’ Button for AI video frame interpolation tutorial.
Step 10
The next menu is where you can confirm your settings before downloading.


Here is the final result from our experiment:
Now you can compare the results of our experiment to the original footage and see for yourself the possibilities with Interpolation using Runway.
As previously mentioned, the results obtained from AI video frame interpolation do not necessarily need to be overly dramatic. By increasing the number of frames, you can achieve smoother transitions in the interpolation process. Maintaining subtle variations in your frames can significantly enhance the output quality. As a result, Runway can avoid interpolating large motions. Frame interpolation synergizes effectively with other tools available in Runway.
Frame interpolation can be combined with tools and techniques like “erase and replace”, “Moving Composites”, and countless others. For the sake of this article, we’ll be diving a little bit into these two, and we’d love to hear your feedback on other ways you are using AI frame interpolation for your projects!
Use frame interpolation with Erase and Replace.
Erase and Replace is a great tool to be combined with Frame interpolation because you can generate variations of one image and combine them to create interesting morphs between objects in the image.
Get Started with Erase and Replace for the interpolation of frames.
Step 1
Go back to the main apps screen in Runway, and choose “Erase and Replace“.


User choosing Erase and Replace for AI frame interpolation tutorial.
Step 2
Upload your desired image. Start with something simple, like a single item on a table.


Screen shot of sphere image in Runway dashboard for AI video interpolation tutorial
Step 3
Highlight the object you want to manipulate, and provide a simple prompt in the prompt editor at the bottom of your RunwayML Window. When you’re ready, click ‘Generate‘.


Step 4
After you click ‘Generate‘, Runway will give you a few options to choose from. Once you’ve found the one that suites you, click on ‘Accept‘.


Step 5
So, now you have two ‘Variations‘ of an image, and you can now use the previous instructions in the section “Step-by-Step Tutorial: Using Frame Interpolation with Runway” to create a morphing effect between them. Head over to the ‘Frame Interpolation‘ tool, and load-in your two images.


User loading in two images for AI interpolation tutorial
Step 6
After clicking on the ‘Generate Button‘, you’ll have a new masterpiece , which will seemingly, and almost magically morph one object into another one in front of your very eyes!

This has so many use cases. Imagine a shot with mountains in the distance, erasing parts of the mountains and generating a slightly different mountain image can create an effect where the mountains appear to be “alive” when interpolated, or a tree growing from a seed. The options are limitless!
Creating Moving Composites
AI image interpolation can be used to create a composite video from several images to create the illusion of movement. Example: Take a photo of a plane and two similar images of clouds.


Step 1
Composite the plane onto each cloud image, ensuring slight differences between the two composites. Then head over to the Interpolation applet in Runway and load in your new distinct frames. Then, finally, proceed with your generation.


Step 2
Interpolating these images can produce a serene video of a plane taking off from the ground and flying amidst the clouds.
Here is the completed video using this method:

These moving composites can be used a myriad of different ways that can add depth and engagement with your final video products. You can create layers of movement with objects overlaid onto other footage to create hyperrealistic video shots using this same approach.
Embrace Exploration and Creativity
The Frame Interpolation Feature of Runway ML provides more than just visually appealing results. It invites you to embark on an exciting journey of experimentation and play, where you can explore endless possibilities with different images and sequences. Countless creators have already achieved remarkable outcomes through frame interpolation, and now it’s your turn to unleash your imagination and craft your own extraordinary masterpieces.
Conclusion
Frame interpolation, as demonstrated with Runway, is a powerful tool for video creators and editors. It bridges the gap between still images and videos, offering a unique way to bring static images to life. Whether you’re aiming for subtle movements or more pronounced morphing effects, frame interpolation provides the flexibility and creativity to achieve your desired results. As with any tool, the key is to experiment, play around, and discover new ways to tell your story. So, dive in, and let your creativity soar with frame interpolation!