
Darkroom printing has long been an increasingly forgotten part of film photography. Even with many new photographers picking up film in recent years, a lot of them seem to ignore the practice of darkroom printing.
While there are probably many reasons why this might be the case, I believe there are two primary factors why younger, first-time film photographers are skipping the final step in film photography.
Reason #1. The Price
For several years now, since the rebirth of film photography, it has gotten harder and harder to find deals on the gear needed to make this medium work. Be it cameras, lenses, scanners, and of course, printing equipment, prices on the secondhand market are continuing to rise as more people enter the space.
While the prices of enlargers, and other needed parts for a darkroom to function are indeed still at a high price at many retail stores, you can still score some great deals with enough patience and a good bit of searching.
I managed to get about 70% of my equipment for $250, and after a little bit of cleaning, it worked as good as new.
Reason #2. The Parts
There are a lot of parts to make a darkroom work. It’s true. There are several small things you need to build a working darkroom. To many, this could seem like a lot to learn in order to make prints at home. But all the parts needed are quite self-explanatory and after seeing how a darkroom works, it becomes very simple.
Unfortunately, there is not too much modern information on the process of setting up a darkroom on the Internet. Spaces like YouTube and Instagram seem to be more focused on cameras and film stocks instead of darkroom printing. These spaces also persuade many photographers to bring their film into the digital world immediately through scanning.
However, ‘building’ a darkroom can be quite straightforward. Of course, one can make it as complex as they desire, but you truly don’t need much to make a print in your house, or even apartment bathroom.
Note: See the list at the end of this article for everything you need to build your own low-budget darkroom at home.
Printing film is arguably the best part of the analog process and is the biggest reason why I still shoot film.
The darkroom is where your images become photographs.
Even compared to scanning, the amount of dynamic range and detail you can pull out of a negative in a silver-gelatin (darkroom) print will be far more than that of basic cheap scans from a lab, or even most home scanning setups. For this reason, if you need to have digital copies of your photographs, it might make more sense to scan the darkroom print using a flatbed scanner rather than scan the negative, because most low-end scanners are unable to pull out the same amount of detail from a small negative.
To retain the full adjustment control and detail of your film, developing and printing yourself is essential. Not to mention, there are arguably some extreme cost savings that quickly add up over time when working this way.
If film is the analog photography process, darkroom printing is the analog editing process. There are pros and cons to working in either a darkroom or digitally using Lightroom, and it certainly comes down to personal preference, but if you are anything like me and prefer working with your hands over a computer, I suggest you give darkroom printing a shot.
How to Build a Low-Budget Darkroom at Home
Let’s move on to how to build a low-budget darkroom at home.
Note: These are the required things you will need to get started making black-and-white prints at home. Based on your needs and preferences, there are countless other things you might like to add/replace, but these are the basics.
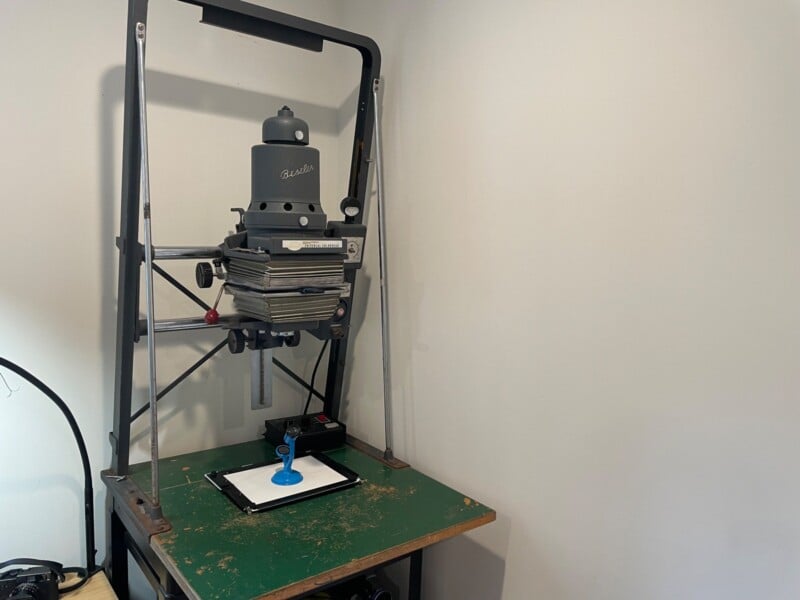
1. Enlarger with Lens
Spend as little or as much as you feel comfortable. With some cleaning and light maintenance, you can get most old enlargers working well. Make sure to get something that will at least support the film format you work with. For example, if you only shoot 35mm, you can get something much smaller than what would be needed to print 4×5 or larger negatives.
Your lens will also be determined by the negative size you are printing. For 35mm film, most people print with a 50mm enlarger lens.
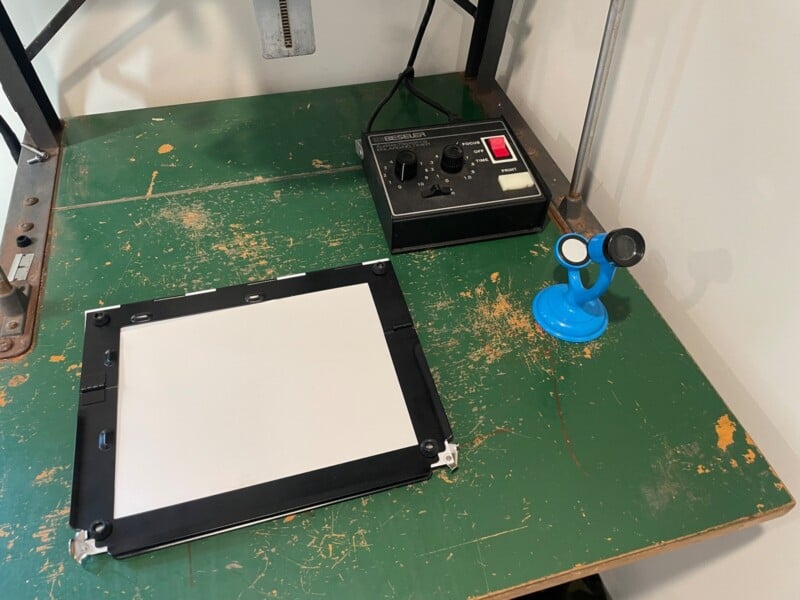
2. Timer
This will control the enlarger to turn on for a set amount of time.
3. Grain Focuser
This is what you will use to focus the image onto your paper to make sure your print is as sharp as possible.
4. Easel
The easel holds your paper flat below the enlarger. New easels can be quite expensive, but you can find secondhand 8×10 easels for very reasonable prices.

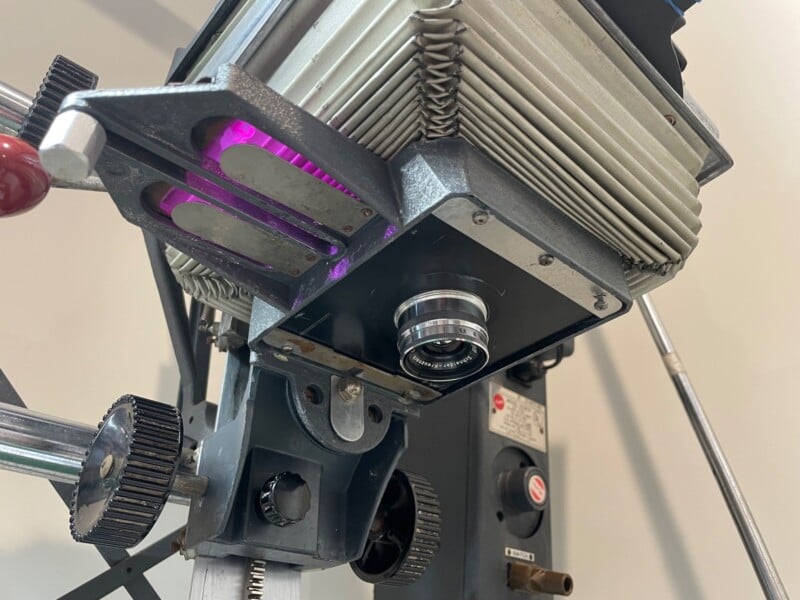
5. Filters
For Multigrade B&W paper, you will use filters to adjust contrast. Make sure to get the size and kind of filter that will work with your enlarger. My Beseler 45MX takes small 3-inch filters that slide in right above the lens, but other enlargers may take different-sized filters. You can always cut larger filters down to work with your enlarger.
6. Contact Print Easel (Glass)
To make a contact print (or contact “sheet” of a roll of film), you will lay the negative(s) directly on the paper instead of enlarging a single image. For sharp contact prints, you will need a way to press the negative(s) flat on the paper. My budget solution for this is to pull the glass out of an old picture frame and tape one side to the baseboard of the enlarger to act as a hinge. Open up the glass, lay your paper and negatives beneath it, close the glass back down, and turn on your enlarger.
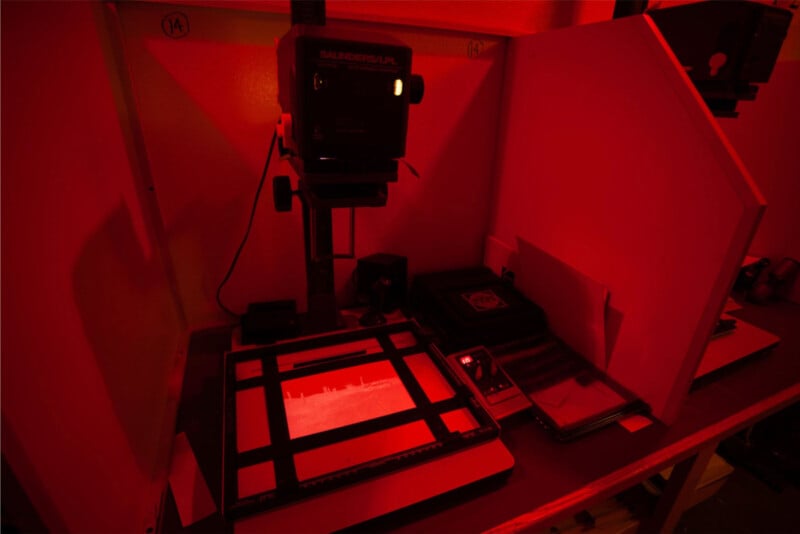
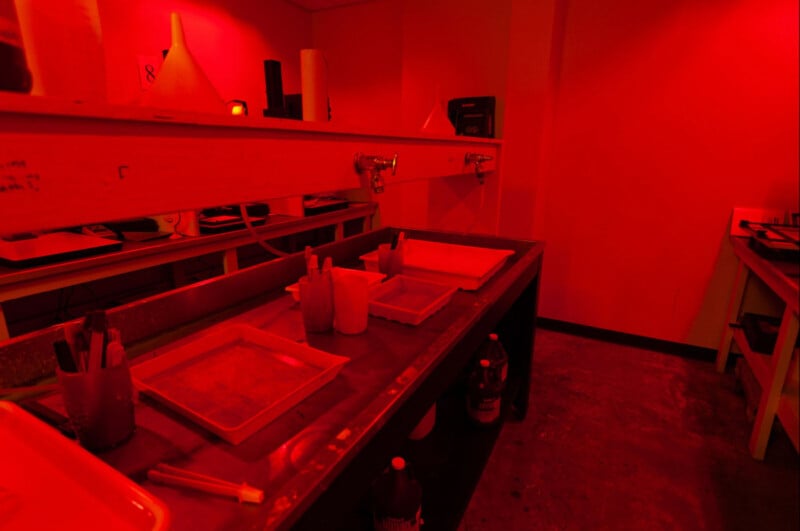
7. Safe Light
Black-and-white printing allows for a red safelight to be on while the paper is out, unlike color printing where it needs to be 100% black.
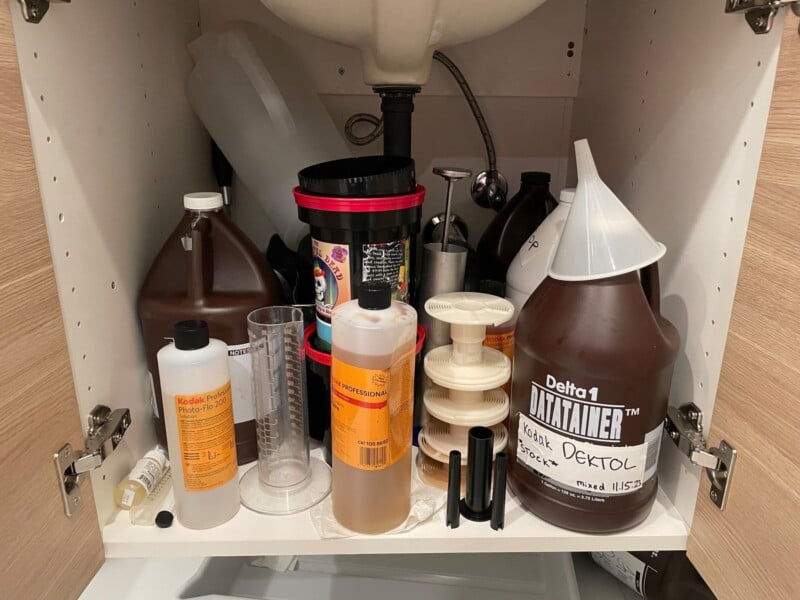
8. Developing Chemicals
For black-and-white printing, you can have a variety of chemical baths that will give different results, but the required basics are a developer, stop bath, fixer, and a rinse. Developer can be diluted to save costs in exchange for longer developing times. Stop bath can be replaced with water (just be sure to replenish often and use hypo-check to test your fixer).
This means at a minimum you will need 4 trays of liquid to create a printed photograph.
I use a removable shower head to let running water flow over my prints for a few minutes in a tray on the shower floor.
9. Developing Trays (4 Minimum)
Get the size of the largest prints you plan on making.
10. Print Hanger
Something simple is more than fine here. String up something in your shower with some clothes pins to let your prints drip dry.
11. Paper
I recommend starting with a multigrade resin-coated (RC) paper. While not quite as nice and archival as fiber-based paper, RC papers require much less washing and are generally easier to work with.
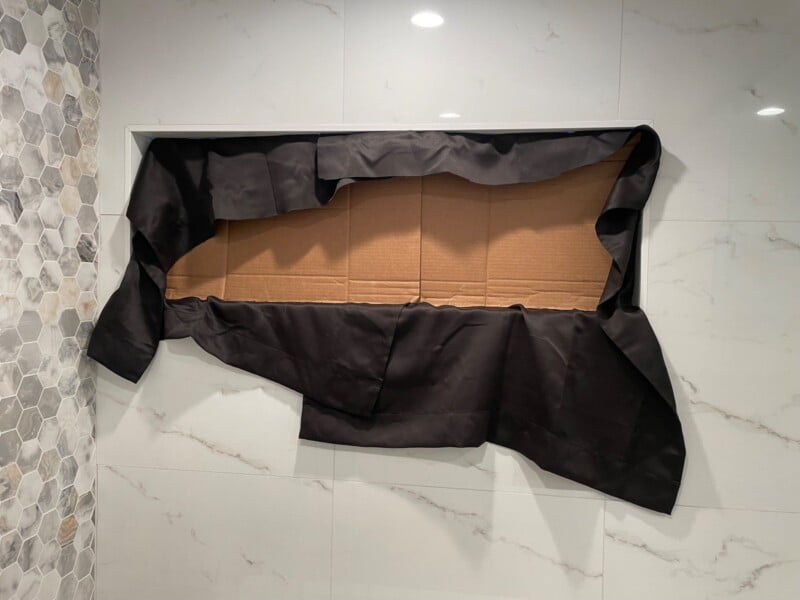
12. Black Out Curtains
You will of course need a way to stop all ambient light from entering your darkroom. This can be done through a variety of methods. However, if you are on a tight budget, I suggest a cheap blackout curtain from Home Depot paired with a cut-to-size piece of cardboard (from a flattened box) to wedge into the windows. Most “blackout curtains” do not block 100% of light, so the second layer is essential.
To stop light from entering around a door frame, I throw an old blanket/bed sheet over the entire door and close it to fill the gaps around the sides and top of the doorway. Then I place a couple of towels at the foot of the door to block the remaining stray light.
And those are all the components you need to start making your first darkroom prints from your home bathroom. Like with most things, darkroom printing can get quite complex, but remember – you only need these few essentials to begin. Then as you are ready to try new processes/papers/etc, you can add them as you go.
There is also a lot of trial and error required to get good at darkroom printing. So, if your first few prints take a few hours/sessions to get looking the way you want, don’t worry. As you get more comfortable with the space and tools in the darkroom, you will get much quicker and smarter about making tweaks to your prints.
P.S. If after reading this article you decide that at-home film development is not for you, here’s a list of reputable film development labs that can process your film for you.